Coxinha Chicken Croquettes are delicious fried pastries found everywhere in Brazil that you can easily make at home! Eat some now, freeze some for later!

Brazilian Coxinha are Chicken Croquettes that are crunchy on the outside, soft and creamy on the inside. They are a traditional savory pastry item that you see all over. Typically, they are filled with a shredded chicken filling. These have a savory chicken, and cheese filling with onion, garlic, cilantro, jalapeno and more! The flavor is amazing!
On the outside, you actually have two layers. First the filling is wrapped up in a pastry dough. Second, the coxinha are dredged in egg and breadcrumbs. Finally, they are deep fried to cook entirely through and get golden brown and crispy crunchy on the outside.
Coxinha in Portuguese means little thigh, as in chicken thigh. This pastry is called coxinha because the shape resembles a chicken thigh. Traditionally the chicken in the filling is shredded much more into fine strands. In my recipe, I kept the shreds larger for more texture. Coxinha are at pastry shops, restaurants, and of course in home kitchens. You will especially see them with other traditional dishes, like Brigadeiros, Brazilian Chocolate Desserts at birthdays, holidays, or other celebrations.

Quick note! This post contains affiliate links, which means I earn a commission (at no extra cost to you) if you purchase from them. This commission is what helps me keep this blog afloat :). I also share these links because I have used the products, genuinely love them, and want you to know exactly what I used.
Ingredients and Swaps for Coxinha
Filling:
- Chicken Breasts, boneless skinless - Boneless skinless chicken breasts or chicken thighs will both work in this recipe. You can also use rotisserie or leftover cooked chicken and simply shred it. In this case, you will also need 4 cups of chicken broth or stock, since the recipe boils raw chicken to make its own broth.
- Bouillon Cubes - This recipe suggests to boil the chicken with bouillon to make your own broth for the dough. If you use precooked chicken, then you do not need bouillon, but you will need broth (see dough ingredients).
- Garlic cloves - Fresh is best when it comes to garlic. You can buy pre-minced garlic to save time or mince it in bulk and freeze it for use when you need it! You can also substitute in dried garlic flakes or garlic powder.
- Jalapeño - You can substitute green bell pepper or simply leave it out.
- Onion, small – I used yellow onion, but you can use white onion, red onion, shallots, or even scallions.
- Olive Oil - I used Extra Virgin Olive Oil to saute the veggies. You can also use vegetable oil, canola oil, coconut oil, or avocado oil.
- Fresh Cilantro leaves - If you don't have fresh, you can use dried cilantro. You could also substitute with fresh basil or fresh parsley.
- Cream Cheese – Regular full fat cream cheese or Low Fat cream cheese will both work. You can substitute with marscapone, cottage cheese, or a combination of these
- Smoked Paprika - The paprika gives a subtle smokey note to the filling. You can substitute with sweet paprika or chili powder.
- Lime - Fresh lime juice is best in this recipe. Lemon juice is second best. If you don't have it, you can add a tablespoon of white wine vinegar or apple cider vinegar. Otherwise, just leave it out.
- Salt and Black pepper - I used kosher salt, but any salt will work. Fresh ground black pepper or finely ground will work.
Dough:
- Chicken broth or stock - In this recipe, I used the broth from cooking the chicken. You can substitute with packaged broth or stock.
- Butter, salted or unsalted - As this is a savory dough, salted butter or unsalted will work.
- All purpose Flour, unbleached - I have not tested this recipe with other types of flour yet, so this is my recommendation. As I test further in the future, I will update the recipe, but also please let me know if you use another flour!
- Salt - coarse or fine salt will work.
Breading:
- Fine breadcrumbs, unseasoned - You can also use panko bread crumbs or gluten free breadcrumbs.
- Salt - Again, coarse or fine salt.
- Eggs - White egg or brown egg in large or extra large size. If you don’t have eggs, then you can use mayonnaise, buttermilk, or yogurt to coat the coxinha so the breadcrumbs stick.
- Vegetable oil for frying - You need a high cooking temperature oil for deep frying. You can substitute with Avocado oil, Peanut oil, Soybean oil, Corn oil, Sunflower oil, or Canola oil.
Simple Equipment and Tools for Coxinha
You will need a medium sized pot for boiling the chicken. Also a medium-large skillet or frying pan for cooking the veggies. I use my absolute favorite 12″ Ceramic Pan, which is great because food really does slide right off with minimal oil and I don’t have to worry about food sticking and burning.
For frying the coxinha, you will need a large deep pot and ideally an oil thermometer with a pot clip.
Mincing garlic is made super easy with a Garlic Press.

Coxinha Chicken Croquette Recipe Tips
There are quite a few lengthy steps to this recipe. They are not difficult, but can take time. My tip for those that may get overwhelmed by the time commitment, is to spread out the steps over a couple days in advance.
Day 1 - Boil the chicken. Later shred the chicken and make the filling.
Day 2 - Make the dough and fill the coxinha. Store in the fridge or freezer until ready to fry.
Day 3 - Bread and fry the coxinha. If they are frozen, you can bread them and bake them in the oven for 30 minutes. Then you can fry them for the crispy finish. If they are from the fridge, bring them out to room temperature for 10 minutes before starting the process of breading and frying.
How to Make Coxinha Chicken Croquettes
Make the filling
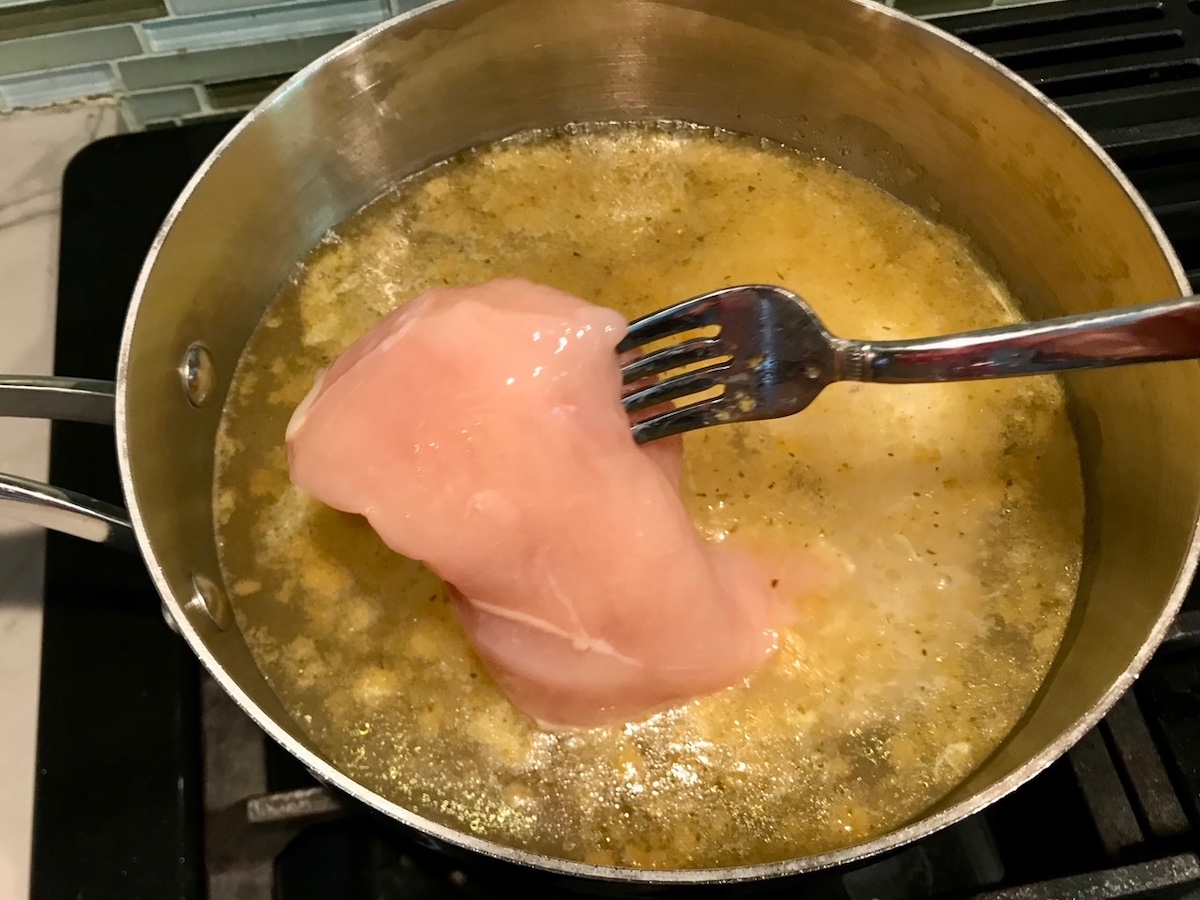
My recommendation is to boil raw chicken breasts in water with bouillon cubes for this recipe. This will give you the broth that you need in for the dough later! Cook the chicken in the boiling water for 5-8 minutes until cooked through and no longer pink in the center or reaches an internal temperature of 165 F degrees. Transfer the chicken to a plate to cool and remove the cooking liquid from the heat but save for the dough.
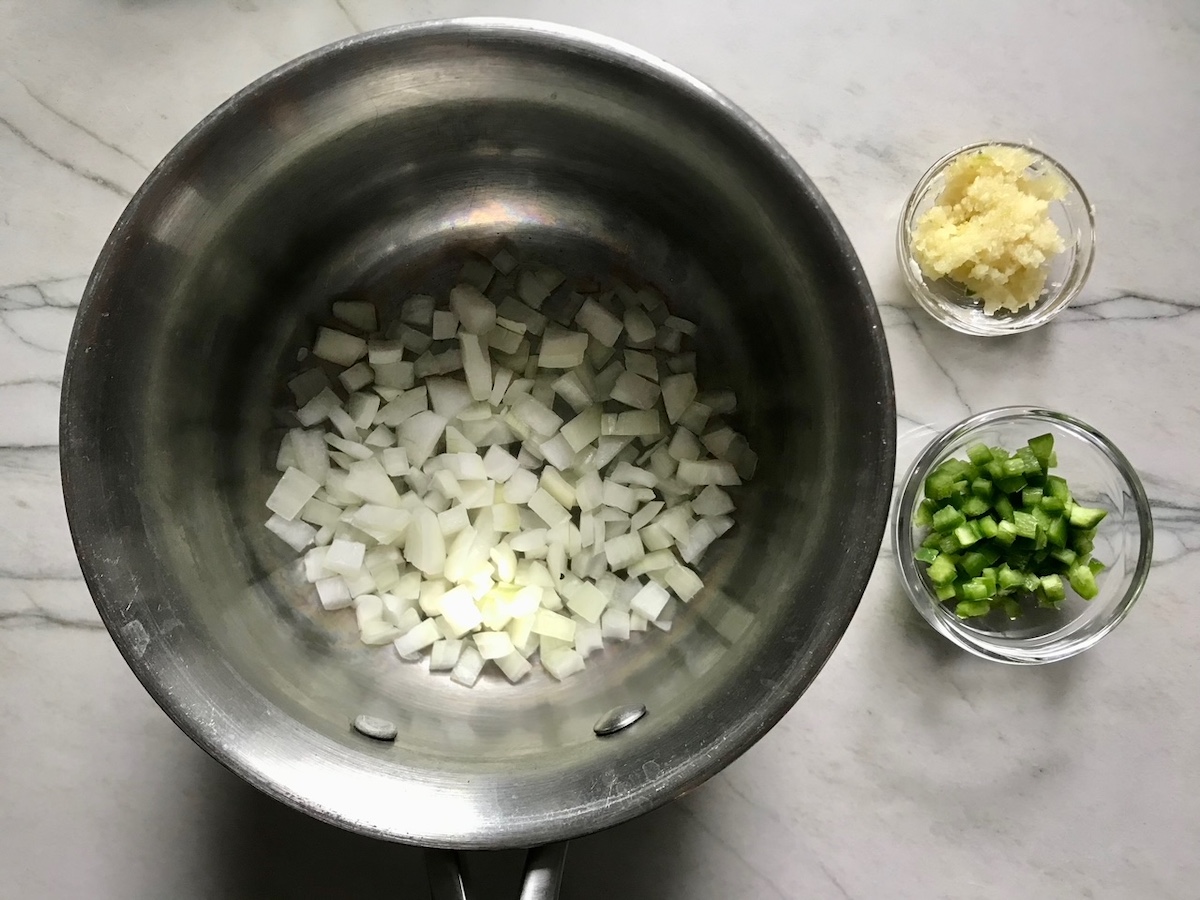
While the chicken is cooking, dice the jalapeno into a fine dice. Dice the onion. Mince the garlic. Chop the cilantro.
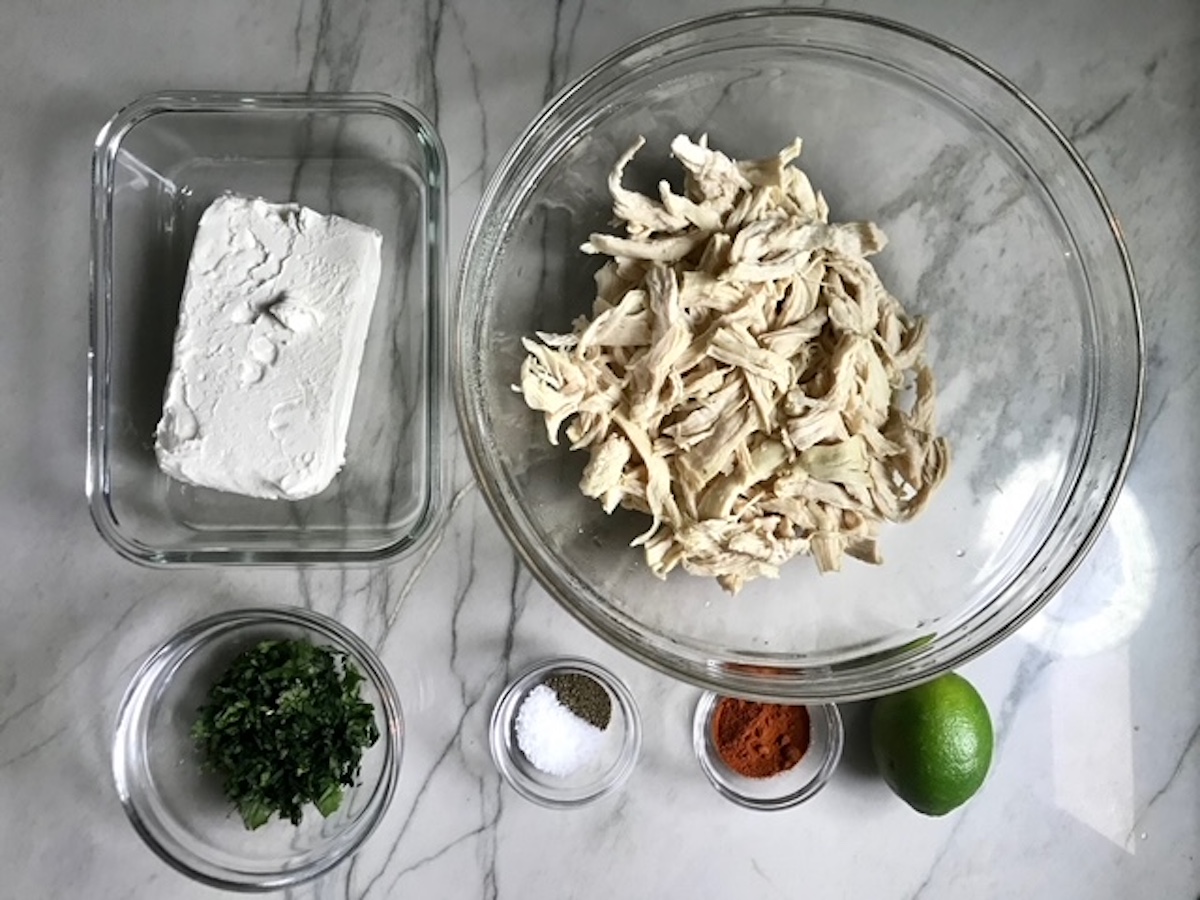
When the chicken is cool enough to handle, shred the chicken, then add it to a large mixing bowl with the softened cream cheese, cilantro, paprika, salt, pepper, and lime juice from the lime.
Preheat a medium frying pan or skillet over medium heat. Add the olive oil, jalapeno, onion, and garlic. Stir to combine and coat in oil and cook for 3 minutes.
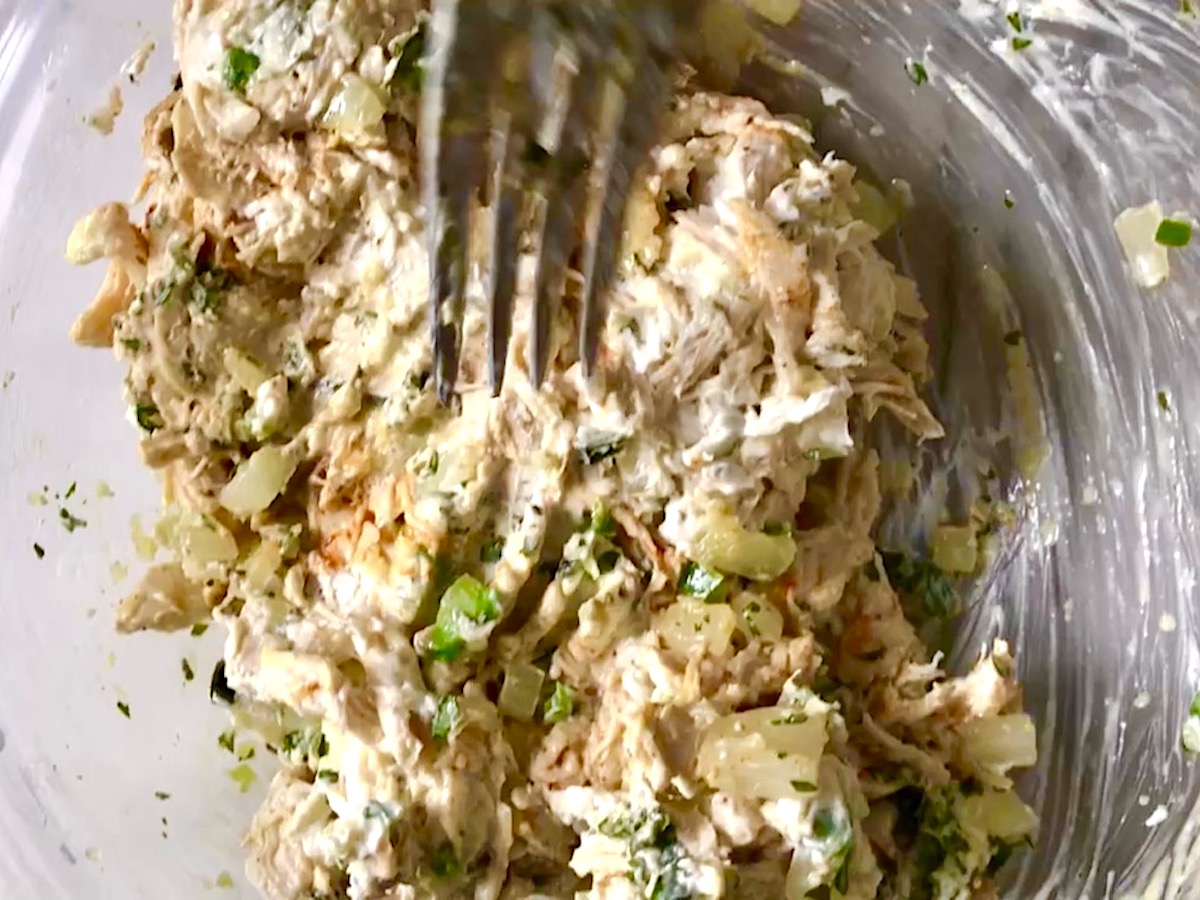
Then add to the bowl with the chicken and cream cheese and mix everything with a fork or spoon to fully combine.
Prep: Make the Dough
Measure out the flour and salt in a bowl and set aside.
Add 4 cups of the chicken cooking liquid (or 4 cups packaged chicken stock or broth) to a large saucepan or pot. Then add the butter and bring to a simmer over medium high heat on the stove.
Turn the stove off and vigorously stir in the flour mixture to the chicken stock until well combined.

Turn the stove back on to medium heat and cook for 1 minute while stirring. Then remove immediately. Let cool for 10-15 minutes.
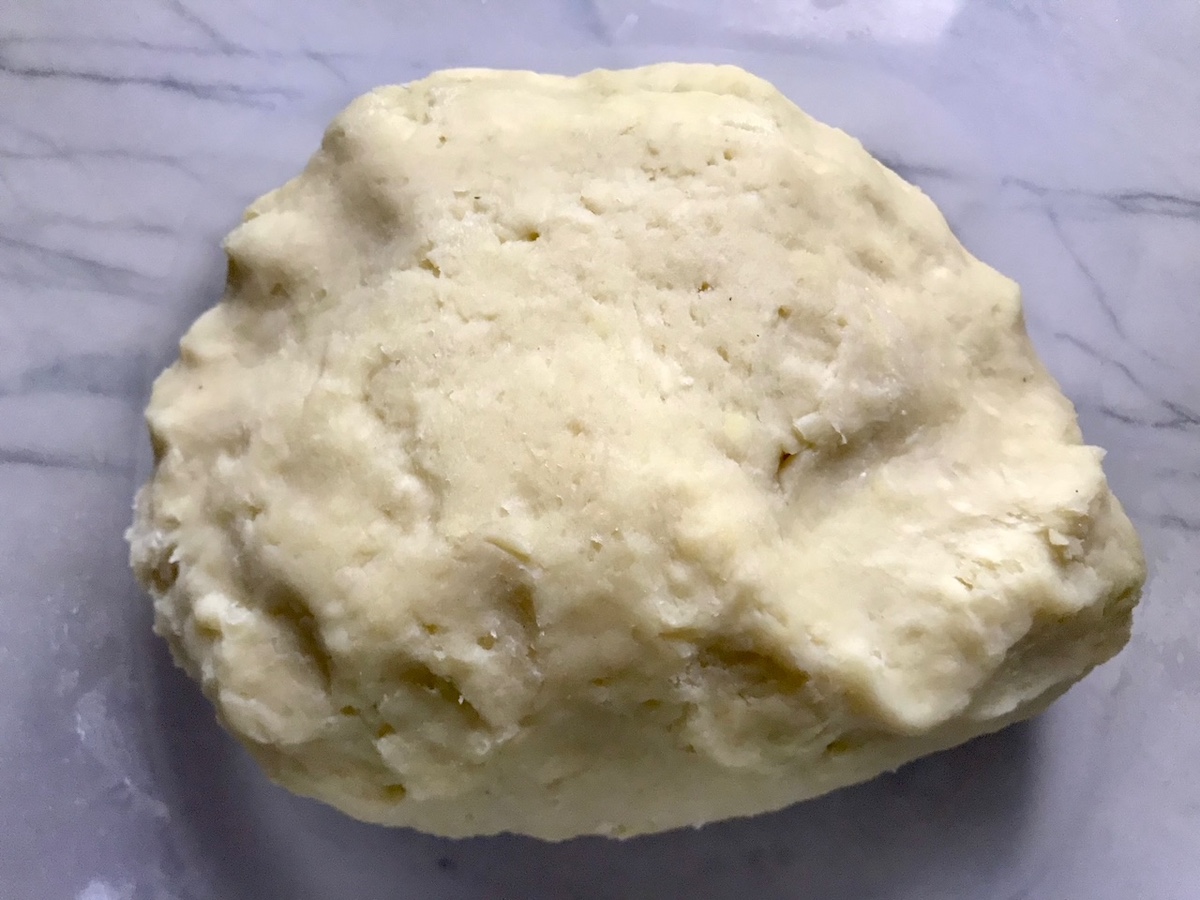
Prep: Fill the Croquettes
Rub butter onto a plate and onto your fingers. Grab a small amount of dough (about 2 tablespoons) and roll into a ball about the size of a golf ball.
Flatten as thin as possible without tearing the dough on the buttered dish.
Fill with 1 tablespoon filling. Fold all of the sides up over the filling and pinch the sides together at the top to form a teardrop (chicken leg shape). Place on a sheet pan as you continue.

Repeat with the remaining dough and filling. At this point, you can split out the ones you want to cook now and those you want to cook later and place those on the sheet pan in the freezer. Once frozen, transfer them to an airtight freezer-safe container.
Bread and Fry the Coxinha Chicken Croquettes
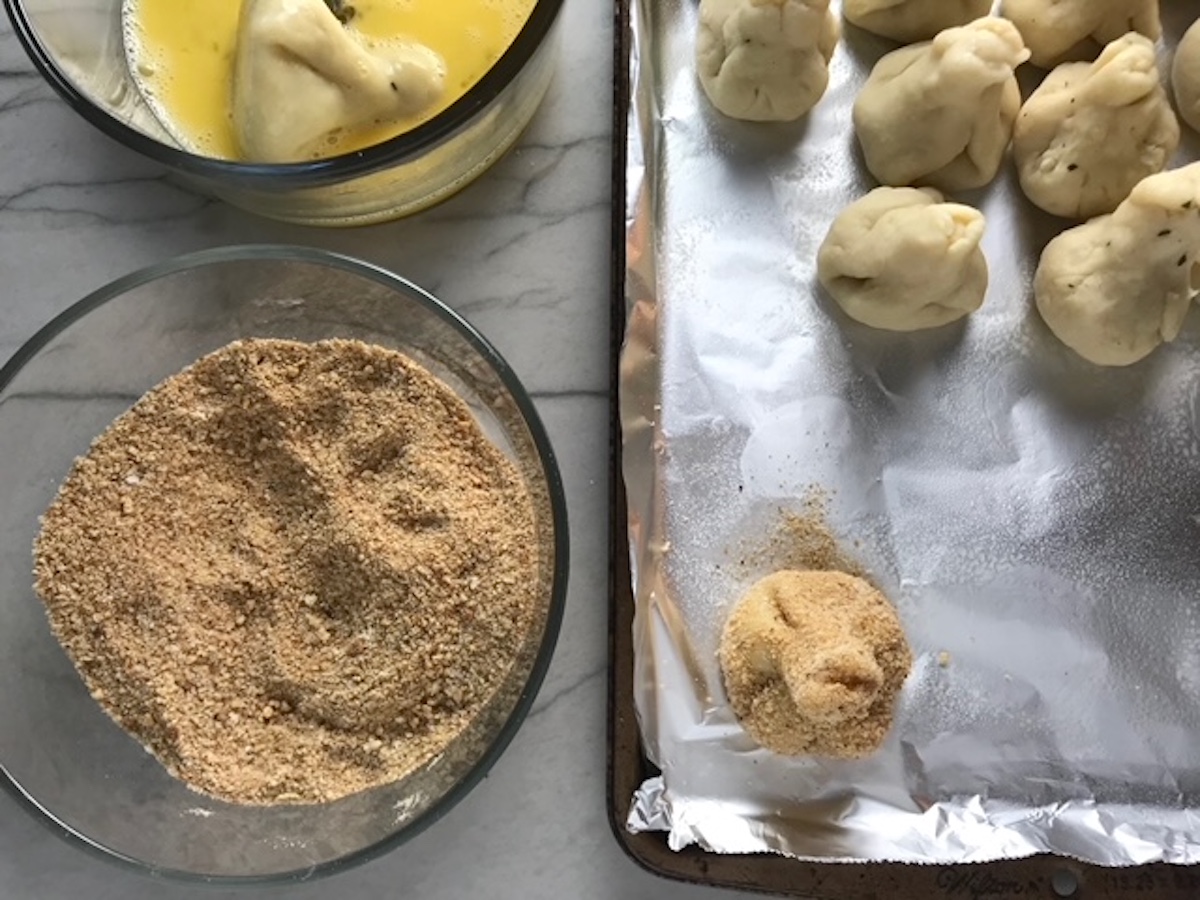
Set up your dredging stations. Whisk the eggs into a bowl. In a separate bowl, add the breadcrumbs.
Dredge one croquette (coxinha) into the egg mixture and then into the breadcrumbs. Then back into the egg and back into the panko. Set on a baking sheet. Do this with all of the croquettes.
Fill a deep pot with vegetable oil until about 5-6 inches deep (you want to submerge the coxinha) and heat on medium-heat until the oil reaches 360 F.
Fry 3-4 of croquettes at a time, submerging each into the oil. Fry for 3-4 minutes until golden brown. Transfer them to a paper towel lined baking sheet.

Coxinha Chicken Croquette FAQs
You can make these coxinha chicken croquettes entirely through to the frying step. You can then store them in an airtight container in the refrigerator for up to 4-5 days. To reheat them, place in a 350 F degree oven for 10-15 minutes. You can also freeze them in an airtight, freezer-safe container for up to 6 months. To freeze, place the croquettes on a sheet pan in the freezer for 2-3 hours. Once frozen, transfer to an airtight container. From the freezer, place them in a 375 F degree oven for 30 minutes or until warmed through to the center.
You can change up the chicken filling to so many different options! You can use cooked shredded beef or pork. Ground chicken, beef, or pork will also work great. You can also go vegetarian by using mushrooms in the filling or a combination of mushrooms, bell peppers, zucchini, carrots, or other veggies you love.
If your coxinha taste like there is too much dough or the dough is not fully cooked, then there are a couple possible reasons. First, make sure that you are rolling or flattening the dough balls thin enough. Second, make sure that the oil is hot enough and that the coxinha are submerged in the hot oil and fried long enough to cook through.
Be sure to check out the web story for these delicious Coxinha Brazilian Chicken Croquettes!

Coxinha Chicken Croquettes
Ingredients
Filling:
- 16 ounces Chicken Breasts, boneless skinless
- 2 cubes Chicken Bouillon (or 2 teaspoons chicken base)
- 4.5 cups Water
- 1 teaspoon Olive oil
- ¼ up Jalapeno, deseeded, diced
- ½ cup Onion, small diced
- 3 cloves Garlic, minced
- ¼ cup Fresh Cilantro chopped
- 8 ounces Cream cheese, softened
- ½ teaspoon Smoked Paprika
- 1 Lime, juiced
- 1 teaspoon Salt
- ½ teaspoon Ground Black Pepper
Dough:
- 4 cups Chicken broth or stock
- 2 tablespoons Butter, salted or unsalted
- 4 cups All purpose Flour, unbleached
- 2 teaspoons Salt
Breading:
- 2 cups Fine breadcrumbs, unseasoned (panko or gluten free breadcrumbs also work)
- 1 teaspoon Salt
- 4 Eggs
- 1 Tablespoon Cold Water
- Vegetable oil for frying (enough to cover the coxinha croquettes)
Instructions
Prep: Make the filling
- In a medium pot, add 4 ½ cups of water plus the 2 chicken bouillon cubes and then bring to a boil. Add the chicken breasts and cook for 5-8 minutes until cooked through and no longer pink in the center or reaches an internal temperature of 165 F degrees. Turn off the heat, transfer the chicken to a plate to cool and remove the cooking liquid from the heat but save for the dough.
- While the chicken is cooking, dice the jalapeno into a fine dice. Dice the onion. Mince the garlic. Chop the cilantro.
- When the chicken is cool enough to handle, shred the chicken, then add it to a large mixing bowl with the softened cream cheese, cilantro, paprika, salt, pepper, and lime juice from the lime.
- Preheat a medium frying pan or skillet over medium heat. Add the olive oil, jalapeno, onion, and garlic. Stir to combine and coat in oil and cook for 3 minutes. Then add to the bowl with the chicken and cream cheese and mix everything with a fork or spoon to fully combine.
Prep: Make the Dough
- Measure out the flour and salt in a bowl and set aside.
- Add 4 cups of the chicken cooking liquid (or 4 cups packaged chicken stock or broth) to a large saucepan or pot. Then add the butter and bring to a simmer over medium high heat on the stove.
- Turn the stove off and vigorously stir in the flour mixture to the chicken stock until well combined.
- Turn the stove back on to medium heat and cook for 1 minute while stirring. Then remove immediately. Let cool for 10-15 minutes.
Prep: Fill the Croquettes
- Rub butter onto a plate and onto your fingers. Grab a small amount of dough (about 2 tablespoons) and roll into a ball about the size of a golf ball. Flatten as thin as possible without tearing the dough on the buttered dish. Fill with 1 tablespoon filling. Fold all of the sides up over the filling and pinch the sides together at the top to form a teardrop (chicken leg shape). Place on a sheet pan as you continue.
- Repeat with the remaining dough and filling. At this point, you can split out the ones you want to cook now and those you want to cook later and place those on the sheet pan in the freezer. Once frozen, transfer them to an airtight freezer-safe container.
Fry the Croquettes
- Set up your dredging stations. Whisk the eggs into a bowl. In a separate bowl, add the bread crumbs.
- Dredge one croquette (coxinha) into the egg mixture and then into the breadcrumbs. Then back into the egg and back into the panko. Set on a baking sheet. Do this with all of the croquettes.
- Fill a deep pot with vegetable oil until about 5-6 inches deep (you want to submerge the coxinha) and heat on medium-heat until the oil reaches 360 F.
- Fry 3-4 of croquettes at a time, submerging each into the oil. Fry for 3-4 minutes until golden brown. Trasfer them to a paper towel lined baking sheet.
Video
Notes
-
Can I made Coxinha ahead and reheat?
You can make these coxinha chicken croquettes entirely through to the frying step. You can then store them in an airtight container in the refrigerator for up to 4-5 days. To reheat them, place in a 350 F degree oven for 10-15 minutes. You can also freeze them in an airtight, freezer-safe container for up to 6 months. To freeze, place the croquettes on a sheet pan in the freezer for 2-3 hours. Once frozen, transfer to an airtight container. From the freezer, place them in a 375 F degree oven for 30 minutes or until warmed through to the center. -
Can I make Coxinha with beef or just vegetables?
You can change up the chicken filling to so many different options! You can use cooked shredded beef or pork. Ground chicken, beef, or pork will also work great. You can also go vegetarian by using mushrooms in the filling or a combination of mushrooms, bell peppers, zucchini, carrots, or other veggies you love. -
Why do my coxinha seem so doughy?
If your coxinha taste like there is too much dough or the dough is not fully cooked, then there are a couple possible reasons. First, make sure that you are rolling or flattening the dough balls thin enough. Second, make sure that the oil is hot enough and that the coxinha are submerged in the hot oil and fried long enough to cook through.
Chef Mimi
Oh how wonderful! That filling is just fabulous - so flavorful. A lot of work, but if they freeze well, so much better! Thanks!
Kim
Thank you so much for this recipe. I have an unusual question. Since I cannot eat fried foods, do you think I could use the chicken sauce portion of the recipe and add to puff pastries for the oven? Or maybe crescent rolls? I’ve never used the puff pastry dough but I really want to try your recipe.
Thank you in advance.